
How to Photograph the Northern Lights with an iPhone



Are you wondering how to photograph the Northern Lights with an iPhone? Here are all of our top tips and tricks for getting the perfect picture.
If you’re anything like us, then you’ve probably been dreaming about seeing and photographing the northern lights in Iceland. However, if you don’t have an expensive camera, can you photograph them? The good news is, yes, you can!
We’ve managed to capture the Northern Lights plenty of times with just our smartphones and, while the photographs might not be quite as high quality as if we’d used our camera, they are still good pictures.
Plus, if you don’t own a camera, you don’t need to go out and purchase some expensive equipment to capture this incredible phenomenon.
Here’s everything you need to know to get amazing northern lights photography with an iPhone.
*This post may contain affiliate links that earn us a small commission at no extra cost to you. For more information, read our disclaimer.
P.S.: For this post, we’ll be focusing on the lights in Iceland because that is where we have the most experience. But you can use these tips to photograph them in Norway or any country within the Arctic Circle.
What do you need to photograph the Northern Lights with an iPhone?
When it comes to Northern Lights photography, there’s a lot more to it than simply pointing your camera at the sky. Especially if you want a stable, non-blurry photo! Here are some of the things I recommend investing in to capture the Northern Lights on your phone.
New(ish) iPhone model
You might be able to take photos of the Northern Lights on an older iPhone, but you’ll definitely get better-quality pictures on the recent models.


All the photos on this post were taken on my iPhone 15 Pro. But you can also take quality photography with a 14 Pro – this is what Andrew used during our last trip.
Earlier models may not have sufficient night mode features to capture them clearly.
Tripod
To capture the Northern Lights with any smartphone, you’ll need to use a long exposure. This is much easier to do with a tripod than by hand because, unless you have a really steady hand, you won’t be able to stay completely still for 30 seconds!
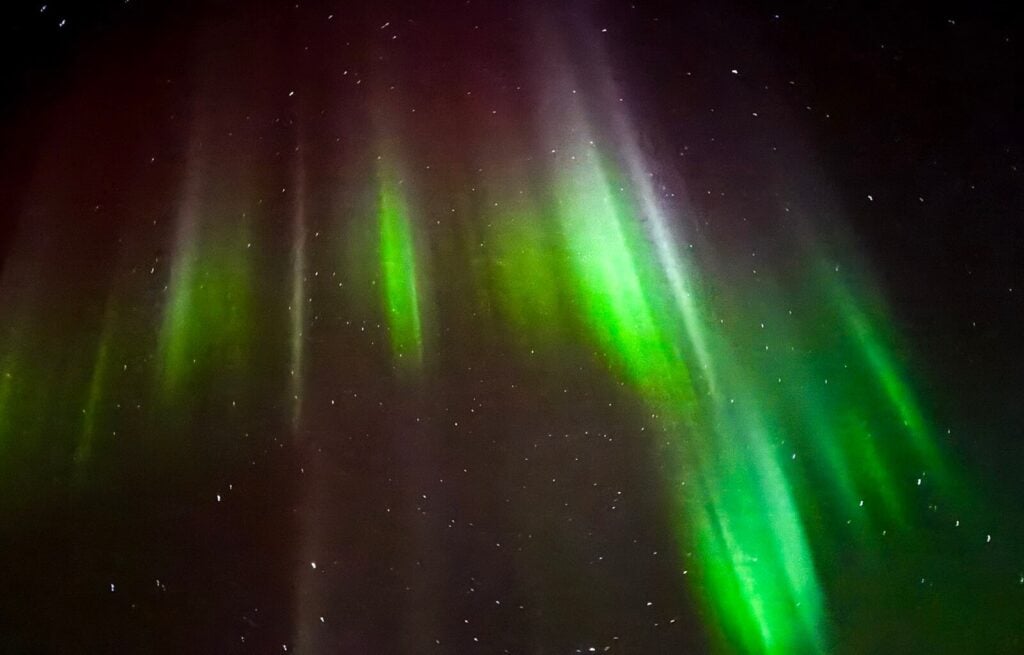
The photo below was taken without a tripod – see how it’s slightly blurry? This is why having one is so important for any kind of night sky photography.

I use a travel tripod like this as it’s lightweight, portable, and easy to pack.
Extra Battery Pack
Cold weather can drain your phone battery. Since you need to be out in the middle of the night in Icelandic winter to get shots of the Northern Lights, it’ll definitely be chilly. So a portable power bank will come in very handy.


I use this one which is both lightweight and small enough to fit in my pocket. It can fully charge my phone 3 times, ideal for long nights taking photos.
How to Shoot the Northern Lights with an iPhone
Now that you’re equipped with the right tools, these are the steps we follow every time to capture the Northern Lights effectively on our phones.
Turn off the flash
Tap the little lightning-shaped button in the corner of your camera screen to turn off the flash. The bright artificial light will overpower the glow of the auroras.


Set your phone on your tripod
Since capturing the Northern Lights involves long exposure, any slight movement will blur your photos.
A tripod like this one is essential to keep your phone steady during the shot. If you don’t have a tripod, resting your phone on a stable surface can also work.
Use manual focus
Once you’ve set this up, frame your shot with a focus on the horizon. Tap the screen to focus on the horizon or distant stars. iPhone autofocus can mess up the composition if you don’t.
Ensure night mode is on
Right next to the flash button, there’s another button that looks like a moon with lines coming off of it. Ensure this is turned on.


Set a longer exposure time
This is essential for capturing light over time.
Click on the little down arrow at the top of your screen to bring up the additional settings.


Once the bottom menu has loaded, select the second symbol across from the left, which is the same symbol you used to turn on night mode.

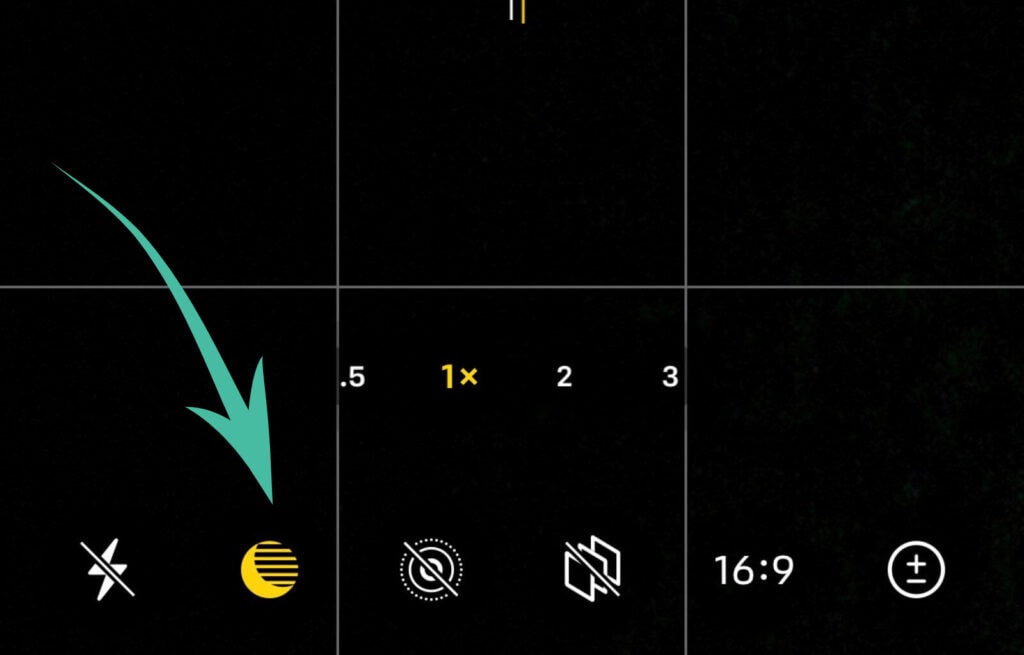
You should see the option to set the exposure time to a maximum of 30 seconds, but you can still capture the lights on a 10-second exposure.

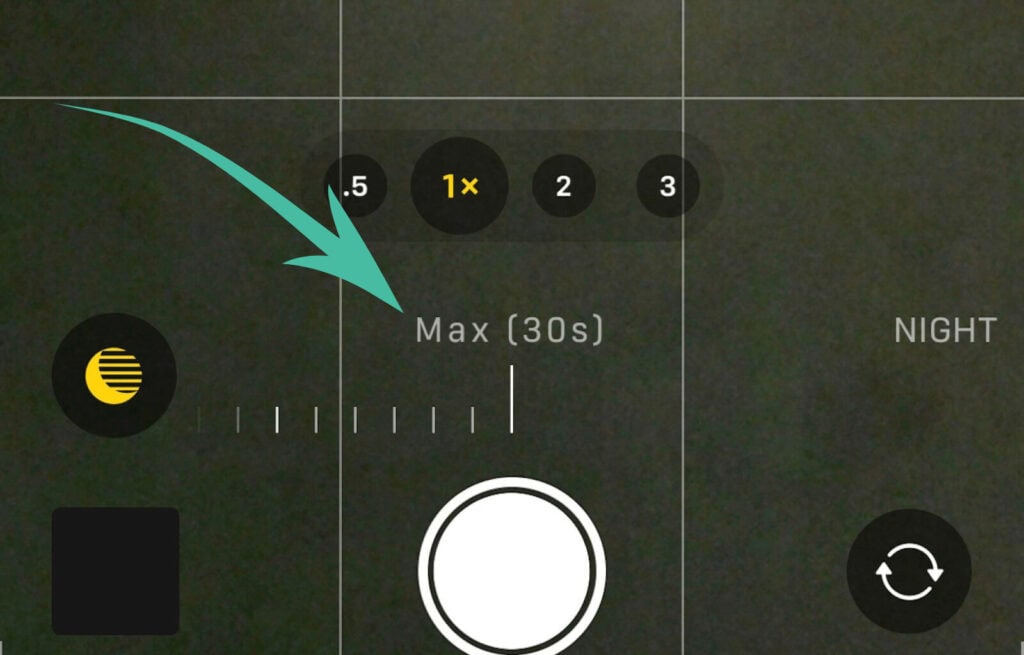
TOP TIP: You can only see the option for 30-second exposure if your phone is completely still – another reason why having a tripod is essential.
Finally, press the shutter and take the shot!
I recommend taking multiple shots as the lights move around a LOT.
Editing Your Photography
I’ve always said that the edit can make or break a photo. While you might capture some stunning pictures without editing them, you can usually tweak the settings slightly to further enhance your photography.
I use Adobe Lightroom to edit my photography. This is one of the best apps for mobile photo editing, offering a wide range of tools to adjust lighting, contrast, and colours. Plus, because it’s designed for mobile, you can make all of the adjustments you need on your phone.


Here’s an example of some of the edits I’ve made to our Northern Lights photography. The differences are really subtle, but they really bring out the stars and the colours of the aurora.
Exposure
I always start with the exposure as the shot might be too dark or too bright. You can adjust the exposure and brightness settings to ensure the auroras are clearly visible without washing out the image.

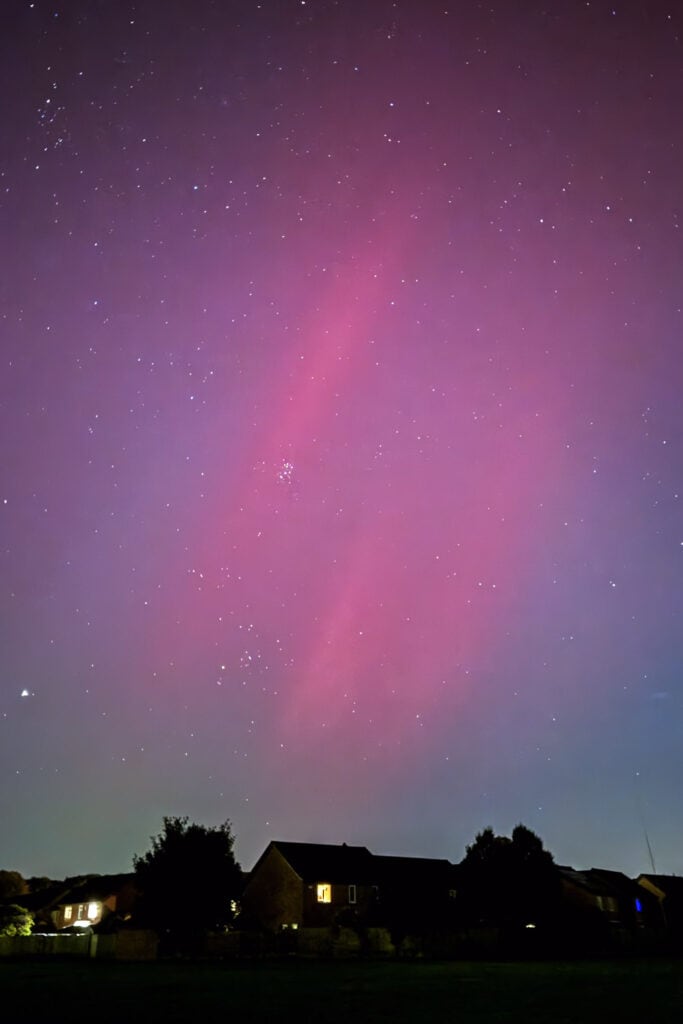
Keep the foreground in mind too—if it’s completely dark, try slightly brightening it to add context to the scene.
Vibrance and Colour Correction
The vibrant colours of the Northern Lights are usually what makes photographs stand out—typically greens, purples, and sometimes reds and pinks.
I always use the saturation and vibrance sliders to make these colours pop. But be careful not to oversaturate, which can make the image look unnatural.


You can also go into the colour tab and adjust the saturation of the greens, purples, or pinks specifically as opposed to the entire image.
Noise Reduction
Even with the best settings, long-exposure shots often introduce noise (graininess) into your images, especially in low light.
I always use the noise reduction tool to smooth out the grain, particularly in the darker parts of the photo like the night sky.
Pro Tips for Capturing Stunning Northern Lights with an iPhone
Last but not least, here are a few tips on how to photograph the Northern Lights with an iPhone.
Pick the right season
The Northern Lights can only be seen when it’s completely dark.
Since the midnight sun during Iceland’s summers means that the sun doesn’t dip below the horizon, it doesn’t get dark enough for it to appear.
The lights can only be seen during the winter between late September and mid-April but the best times are usually In September, October, February, and March.
Track the aurora borealis with an app
While you can go out every day and hunt for the northern lights, it’s normally better to go out when the chances of seeing the lights are higher. An aurora app can typically tell you the probability of seeing the lights along with the cloud coverage and KP level.


The intensity of the aurora is measured on the KP scale which ranges from 0-10. During a standard Northern Lights season, the KP level is typically between 1 and 4, but it can go up higher during a solar storm.
The highest I’ve seen it was an 8 (that was what the app looked like above) and the lights were so intense they could be seen across a lot of Europe.
The app we used above is one of our favourite apps for Iceland – check out our full list here.
Your camera will capture more than what you can see
This is always something that shocks people about the Northern Lights. The green that you see in photos is almost always edited and it’s rarely that vibrant in real life.
We’ve seen the Northern Lights 3 times and, while we have been able to see the colours in the sky, it’s been much fainter than cameras can pick up.

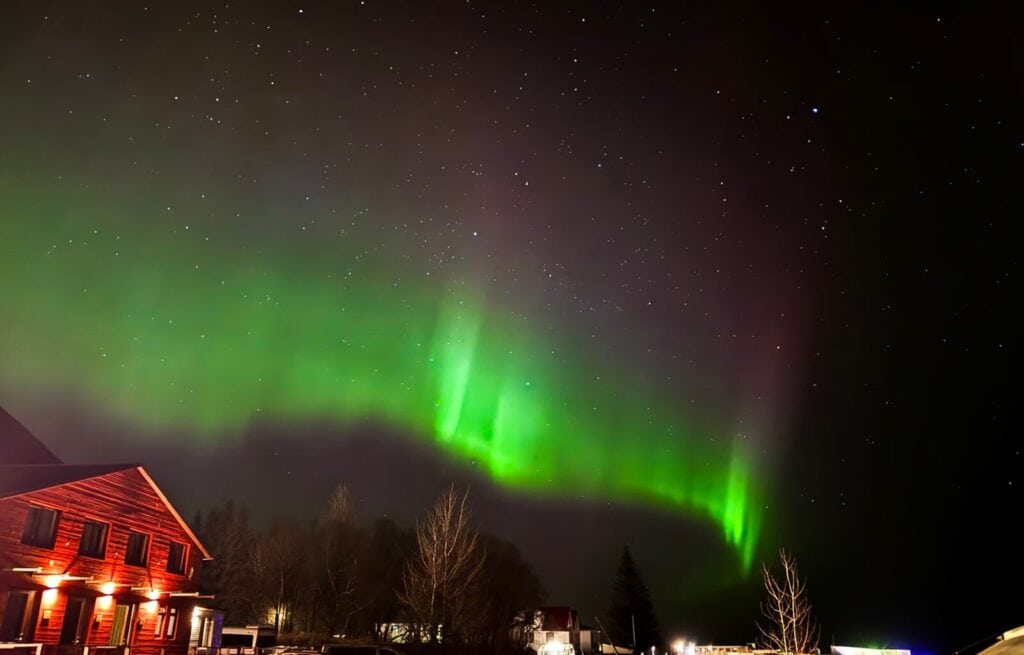
The very first time we saw them in Iceland, they looked like wispy clouds in the sky and it was only when we pointed our cameras at them that they turned green.
This is purely because the camera lens lets in much more light than our eyes, so it’s almost always going to appear fainter to the naked eye.
Make sure it’s properly dark
That being said, if it’s not fully dark where you are standing, then you most likely won’t be able to see the lights at all.
The exception to this is unless they are really strong, like during the solar maximum of 2024/25, where there was a KP of 8 and they could be seen clearly over Reykjavik.


Even if the KP is strong, the further away from artificial light you go, the clearer you will see the Northern Lights.
A few of the best places to see the Northern lights in Iceland include Thingvellir National Park on the Golden Circle and Jökulsárlón Glacier Lagoon.
Check if your accommodation has a wake-up service
Many hotels in Iceland have a Northern Lights wake-up call. This usually means that you can sign up at reception with your room number and, if the aurora appears, they will buzz you and wake you up.


Many accommodations along the south coast offer this along with places in the Golden Circle. We’ve used this service many times in Iceland and it’s a great way to see the Northern Lights without having to sit awake all night.
The sign-up sheet above was from our stay at Hotel Selfoss.
Be patient
The Northern Lights are most commonly seen between 9pm and 2am.
Sometimes they won’t be there at all or will be very faint. But they can suddenly appear or become extremely vibrant within minutes. Patience really is a virtue.
For example, the first photo below was taken at 9pm and the one underneath was taken at 10:30pm in the same spot. The colours were so much more vibrant as the night went on.


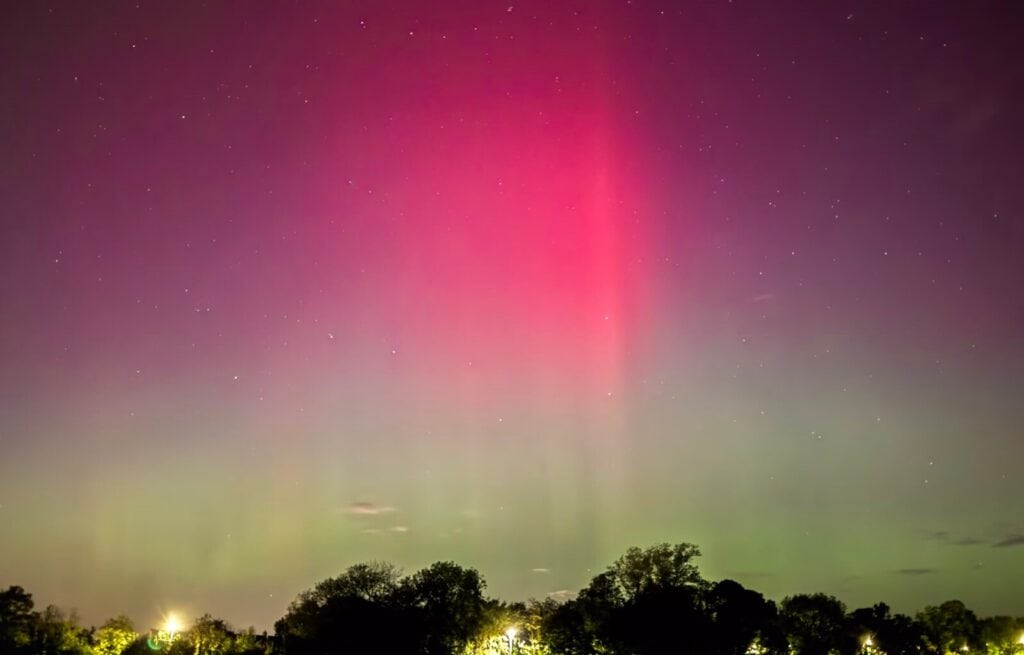
My sister and I once sat out in our hotel car park until 3am waiting for the northern lights to appear. Luckily they did, and it was definitely worth it.
Wrap up warm
It almost goes without saying but, if you’re spending hours outside standing around in Icelandic winter, you’re going to need to wrap up warm. Winters in Iceland can be harsh, but it’s during these colder months that you can see the aurora.
Check out our winter packing list for Iceland for everything I recommend packing.
Can you get the best photos of the Northern Lights with an iPhone?
Smartphone camera quality is pretty amazing these days and you can take some incredible photos with an iPhone. Admittedly, you may not be able to get the best photos and you will almost certainly be able to take higher quality pictures with a digital camera.
However, we don’t necessarily think it’s worth going out and buying one just to capture the northern lights. You can get some really cool photos of them using nothing but your iPhone and a portable tripod.
If you’re planning on visiting Iceland in the winter, I hope this guide helps you take some incredible iPhone photos of the aurora borealis. The Northern Lights really are one of the best things to see in Iceland and it’s a breathtaking experience.
If you have any other questions about how to photograph the Northern Lights with an iPhone, join our free Facebook Group and ask anything you want!
👉 Planning a trip to Iceland in winter? Here’s our ultimate south coast itinerary.
Pin for Later!